USB flash drive is very convenient because of the portability factor, but they can often pose a security risk. If you lose your USB drive, there's no telling into whose hands your data might fall. The best way to keep your data safe is to encrypt your USB with a strong password that is unique and hard to hack. This article shows you various ways to secure your information by encrypting USB on Mac.
The built-in Disk Utility app on Mac will also be able to encrypt USB for you, but you'll need to erase and format it before you can apply password protection. That also means you need to take a backup of whatever is in the drive before encrypting it. You can add the data again once the drive has been prepared. Here are the steps to follow:
Step 1: Insert your USB drive into the computer and launch Disk Utility from Applications > Utilities.
Step 2: In the left sidebar, make sure Show All Devices is ticked. Then select your drive from the sidebar. Don't select the volume name that appears below it.
Step 3: At the top of the Disk Utility window, click on Erase and add a name for your USB drive in the popup window. Select GUID Partition Map in the dropdown for Scheme, and then choose Mac OS Extended (Journaled, Encrypted) as Format option.
Please note, the password option won't pop up if you chose other partition scheme and format.
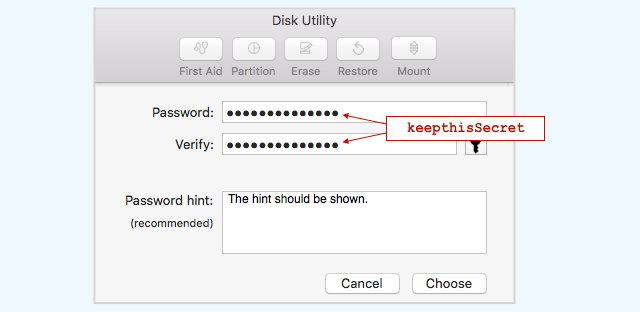
Step 4: Once you hit Erase, you'll be asked to enter a password twice, as well as a password hint that you can type in. Select Choose, and then Erase again to format and encrypt the drive.

Step 5: Wait 2-3 minutes and the USB is fully encrypted by password. Next time you insert the USB on Mac, a small window pops up asking for password to unlock the device.
The steps are simple but have two major pitfalls basically. First, the drive must be eased so the data on the USB will be deleted. You have to backup and copy data to it after encryption, which takes a lot of time if the volume is large enough. Another mojar disavantage is that the drive can not be used on Windows or Linux.
You can encrypt an external volume by applying a password using FileVault, the built-in feature in macOS. This offers secure AES protection for your data, but there are a couple of things to remember. First of all, any external or internal drive encrypted with FileVault will not be accessible in a Windows computer even if you know the password. Second, once you configure the password, you won't be able to change it. Nevertheless, this method is probably the easiest way to encrypt an external drive like a USB flash drive. Let's see how to go about it.
Step 1: Insert your USB drive into the Mac and open a Finder window.
Step 2: When you see your removable disk in the left panel, right-click it and select Encrypt from the contextual menu.

Step 3: In the FileVault window, you can set a password by typing it in twice, as well as set a password hint in case you forget it.
Step 4: Once you confirm the password and hint, the drive will be encrypted, and only that password can open it. Also, you can only unlock it on a Mac, as mentioned earlier.
To use this drive, just plug it into your computer and enter the password when prompted to do so. You can then keep working with files in the drive, and the encryption will happen automatically on all data and files that are added to it. Just unplug it when you're done.
There are clearly some disadvantages with this method. Apart from not being able to unlock it in Windows and not being able to change the password, if the drive is not formatted to the GUID partition style, you may not see the Encrypt option in Finder when you right-click the drive. As an alternative, you can use a third-party encryption tool that will allow you to unlock it from any machine as long as you know the password. This is obviously more convenient if you're going to be using the drive with multiple computers.
You can also consider using a third-party encryption tool like VeraCrypt, but the process is complicated and it requires another utility called OSXFUSE, after which you need to download and install VeraCrypt, create a hidden volume and then move your data to it once it's set up.

Since this is not meant for first-time users, the better way would be to either use the Finder feature (FileVault) or the Mac app (Disk Utility.)