Table of Contents
Screen recording has become an essential tool in today’s digital world. It allows you to capture and share your screen activity, whether it’s for work, education, or entertainment purposes. While the Game Bar is the default screen recording tool on Windows 10, it may not always be suitable for everyone’s needs. In this blog post, we will explore alternative methods on how to screen record on Windows 10 without using the Game Bar. Whether you want to record a tutorial, stream a video, or document a bug, these methods will provide you with the flexibility you desire.
Why You Need to Screen Record on Windows 10
There are several reasons why you might find yourself needing to screen record on Windows 10. Let’s explore a few of these reasons:
- Creating tutorials or instructional videos: Screen recording allows you to showcase step-by-step processes, making it easier for viewers to understand and follow along.
- Remote collaboration and presentations: Screen recording can be a useful tool for remote workers, enabling them to present their ideas, share their screens, and collaborate with team members effectively.
- Gaming or live streaming: If you are a gamer or content creator, screen recording allows you to capture your gameplay, highlight your winning moments, or stream your content to an audience.
- Troubleshooting and bug reporting: Screen recording provides an effective way to document and share issues or bugs with software developers or customer support teams, helping them understand and address the problem more efficiently.
Method 1: How to Screen Record on Windows using ScreenGeeker
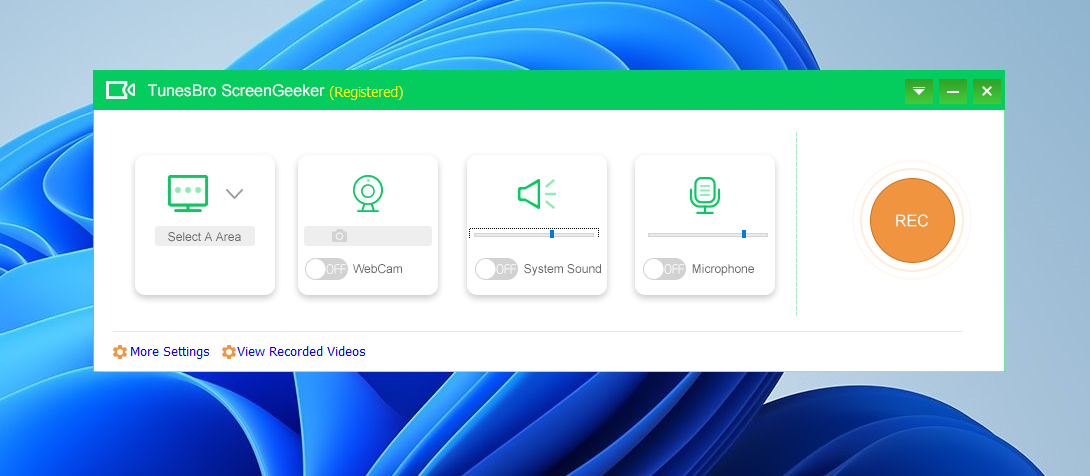
ScreenGeeker is a screen recording software that allows users to capture their computer screens, including recording videos, capturing screenshots, and recording audio. It’s designed to be user-friendly and is suitable for a wide range of purposes, from creating tutorial videos to recording gameplay. The specific features and capabilities of ScreenGeeker can vary, but common functionalities include the ability to record the entire screen, a specific application window, or a custom area of the screen, as well as the option to include system and microphone audio in recordings.


Here’s a general step-by-step guide on how to use ScreenGeeker to record your screen on Windows:
Step 1. Once the download is complete, open the installer and follow the on-screen instructions to install ScreenGeeker on your Windows computer.
Step 2: Setup Screen Recording Options
- Open ScreenGeeker: Launch the ScreenGeeker application.
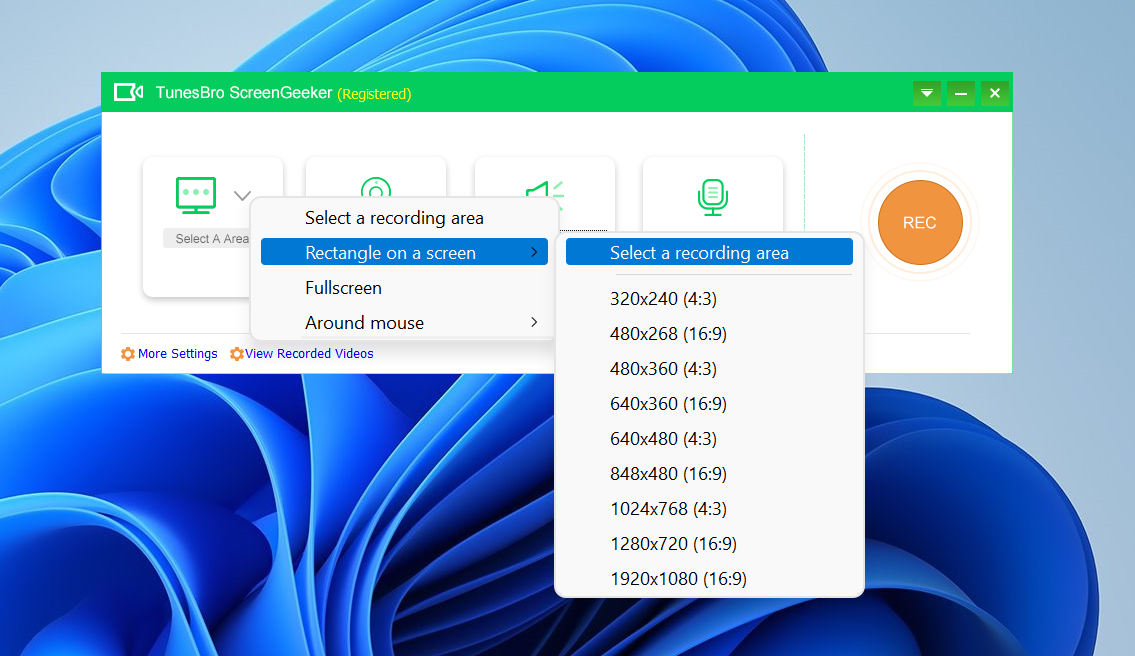
- Select Recording Mode: Choose the type of recording you want to do – full screen, specific application window, or custom area.
- Choose Audio Settings: If you want to record audio, select the appropriate audio source, such as your system’s audio, microphone, or both.
- Configure Settings: Adjust settings like frame rate, output format, and video quality according to your preferences.
Step 3: Start Recording
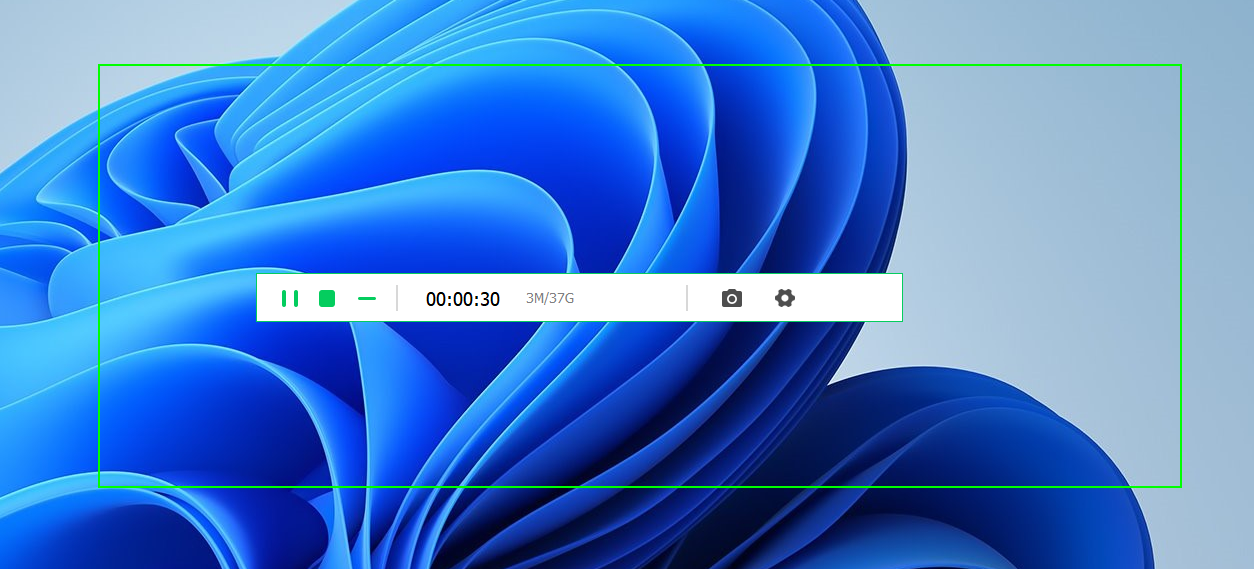
- Start Recording: Once everything is set up, click on the ‘Record’ button to start capturing your screen.
- Perform Your Activities: Do the activities on your screen that you want to record.
- Pause/Stop Recording: You can pause or stop the recording at any time using the controls in ScreenGeeker.
Step 4: Save and Edit Your Recording
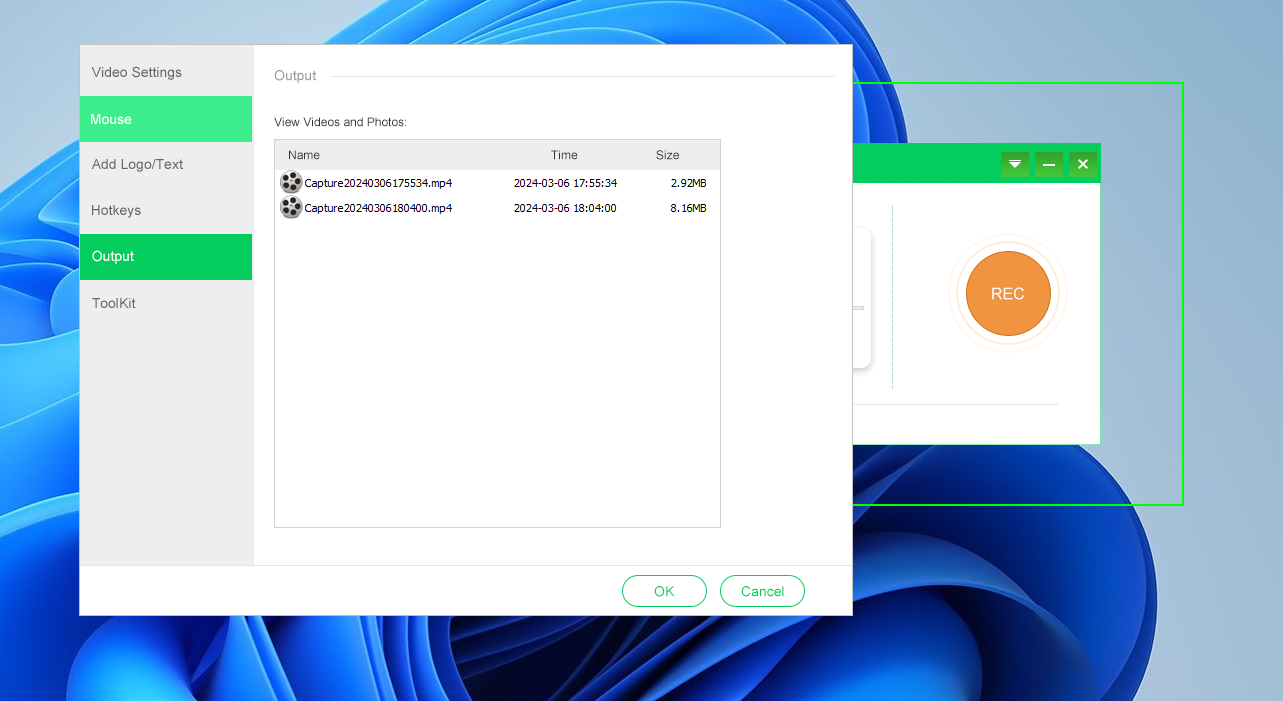
- End Recording: When finished, stop the recording, and ScreenGeeker will typically offer the option to save the video file.
- Save File: Choose where you want to save the recording on your computer and give it a name.
- Edit (Optional): Some versions of ScreenGeeker may include basic editing features to trim your video or make minor adjustments.
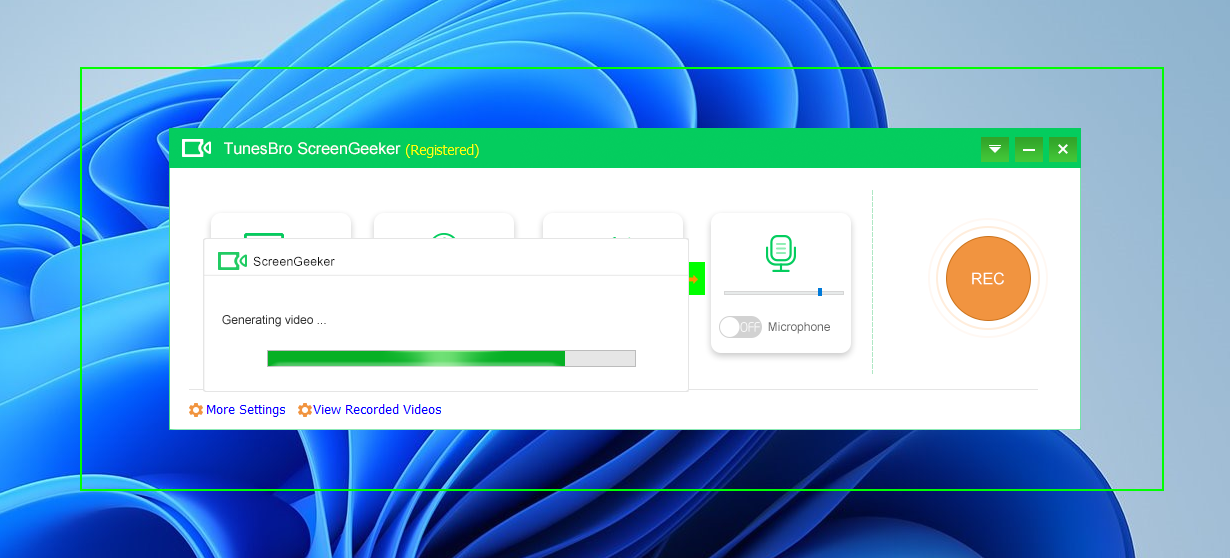
Once saved, your recording is ready to be used for whatever purpose you had in mind, be it sharing online, including in presentations, or for personal reference.
You can download the trail version here:
| Pros | Cons |
|---|---|
| 1. Professional-grade screen recording and video editing capabilities. | 1. Limited recording options and settings compared to dedicated screen recording software. |
| 2. Simple keyboard shortcut for starting and stopping recordings. | |
| 3. Ability to record full-screen applications, specific windows, or regions. | |
| 4. Automatically saves the recorded video to the "Captures" folder. |
Method 2: Using Aiseesoft Screen Recorder
OBS Studio, short for Open Broadcaster Software Studio, is a free and open-source screen recording and streaming software widely used by content creators. Follow these steps to screen record using OBS Studio:
1. Download and install OBS Studio from the official website: https://obsproject.com/
2. Once installed, launch OBS Studio and click on the "Settings" button in the lower-right corner.
3. In the settings menu, select the "Output" tab and choose your desired recording settings, such as the file format, resolution, and bitrate.
4. Return to the main OBS Studio window and click on the "+" icon in the "Sources" box to add a new source.
5. Select "Display Capture" or "Window Capture" to record your entire screen or a specific application window, respectively.
6. Adjust the capture parameters, such as the display or window to record, and click "OK."
7. Click on the "Start Recording" button in the lower-right corner to begin recording.
8. To stop the recording, click on the "Stop Recording" button.
Pros:
1. Advanced recording settings and options, including custom resolutions and bitrates.
2. Ability to record multiple sources simultaneously.
3. Wide range of additional features for live streaming and post-production.
Cons:
1. Beginners may find the interface overwhelming.
2. Requires more initial setup and configuration compared to simpler recording methods.
3. Continuous updates and new features can make OBS Studio slightly complex to use.
Pros:
| Pros | Cons |
|---|---|
| 1. Advanced recording settings and options, including custom resolutions and bitrates. | 1. Beginners may find the interface overwhelming. |
| 2. Ability to record multiple sources simultaneously. | 2. Requires more initial setup and configuration compared to simpler recording methods. |
| 3. Wide range of additional features for live streaming and post-production. | 3. Continuous updates and new features can make OBS Studio slightly complex to use. |
Method 3: Via ShareX
ShareX is a free and open-source screen capture and screen recording software known for its extensive features and customization options. Follow these steps to screen record using ShareX:
1. Download and install ShareX from the official website: https://getsharex.com/
2. After installation, launch ShareX, and you will be prompted to configure the application.
3. In the configuration window, select "Screen Recording" under the "Tasks" section.
4. Customize your recording settings, such as the output directory, file format, hotkeys, and recording options.
5. Once you have configured your settings, click on the "Screen Recording" button in the main ShareX window.
6. Select the screen or application window you want to record, and the recording will start.
7. To stop the recording, click on the ShareX icon in the system tray and select "Stop Screen Recording."
Pros:
1. Extensive customization options for recording settings.
2. Supports multiple file formats and codecs for recording.
3. Highly configurable hotkeys for easy control.
Cons:
1. Initial setup and configuration can be overwhelming for beginners.
2. Advanced features may require some technical knowledge.
3. Continuous updates and frequent changes to the interface may require adaptation.
Pros:
| Pros | Cons |
|---|---|
| 1. Extensive customization options for recording settings. | 1. Initial setup and configuration can be overwhelming for beginners. |
| 2. Supports multiple file formats and codecs for recording. | 2. Advanced features may require some technical knowledge. |
| 3. Highly configurable hotkeys for easy control. | 3. Continuous updates and frequent changes to the interface may require adaptation. |
What to Do If You Can’t Screen Record on Windows 10
If you encounter difficulties or issues while attempting to screen record on Windows 10, here are a few possible solutions:
1. Update your graphics drivers: Outdated or incompatible graphics drivers can affect screen recording performance. Visit the manufacturer’s website or use a driver update software to ensure you have the latest drivers installed.
2. Check your antivirus software: Some antivirus software may interfere with screen recording processes. Temporarily disabling or adding exceptions for your screen recording software in your antivirus settings may resolve the issue.
3. Optimize your system settings: Adjusting your power plan settings and disabling unnecessary background applications can help improve screen recording performance.
Bonus Tips
Here are some bonus tips to enhance your screen recording experience:
1. Use a quality microphone: Clear audio is as important as the video itself. Invest in a good quality microphone for better sound recording.
2. Plan and script your recordings: Prepare an outline or script for your screen recording to ensure a smooth and concise delivery.
3. Use keyboard shortcuts: Familiarize yourself with the keyboard shortcuts of your chosen screen recording software to simplify the recording process and reduce editing time.
5 FAQs about Screen Recording on Windows 10
Q1: How long can I record my screen on Windows 10?
A1: The duration of a screen recording on Windows 10 depends on the storage capacity of your system and the recording settings. Some software may have limitations, while others allow longer recordings.
Q2: Can I record my webcam and screen simultaneously?
A2: Yes, most screen recording software allows you to record your webcam and screen simultaneously. This feature is especially useful for video tutorials or live presentations.
Q3: Can I edit my screen recordings after recording?
A3: Yes, many screen recording software offers built-in video editing capabilities, allowing you to trim, crop, add annotations, and edit your recorded videos.
Q4: Can I record audio along with the screen recording?
A4: Yes, you can record audio along with your screen recording. Most screen recording software allows you to capture system audio, microphone input, or both.
Q5: Are there any legal issues with screen recording?
A5: It is essential to respect privacy and copyright laws when screen recording. Ensure you have proper rights to record and share the content you are capturing.
Final Thoughts
Screen recording on Windows 10 without using the Game Bar provides you with the flexibility and customization options needed to meet your specific requirements. Whether you choose to use the Windows built-in screen recorder, OBS Studio, ShareX, or Camtasia, each method offers a unique set of features and capabilities. Experiment with different options and find the method that suits your needs best. Remember to follow legal guidelines and respect privacy when recording and sharing content. With the right screen recording software, you can capture and share your digital experiences effortlessly.