Table of Contents
With the growing popularity of smartphones, more and more people are using their devices as their primary camera. However, one downside to this is that some phones, such as iPhones, save images in the HEIC format, which is not compatible with all devices and software. This can pose a challenge for photographers who use Adobe Lightroom as their preferred editing software.
In this blog post, we will explore different methods to batch convert HEIC to JPG in Lightroom. We will discuss the steps to convert HEIC files using Lightroom itself, as well as alternative methods using online tools and third-party software. We will also provide pros and cons for each method to help you choose the best option for your needs.
Video Tutorial:
What is Lightroom?
Adobe Lightroom is a versatile and popular photo editing and organization software designed for both amateurs and professionals. It provides a seamless workflow to enhance, organize, and share your photographs. Adobe Lightroom offers a comprehensive suite of tools to help photographers manage, edit, and showcase their images, including the file export feature.
You can import images from your camera or storage devices and export edited photos in various formats and sizes for print, web, or social media.
The Challenge of Batch Convert Heic to JPG in Lightroom
– Different devices and operating systems may not support the HEIC format, making it difficult to view or edit these images without conversion.
– HEIC files may not retain the same level of quality and color accuracy when opened in non-compatible software, which can affect the editing process.
– Sharing HEIC files with others who do not have compatible devices or software can be problematic and may require additional steps for conversion.
– HEIC files may take up less storage space on your device, but they can still be large in size, making it harder to manage a large collection of these files.
Tutorial: How to Batch Convert HEIC to JPG in Lightroom
Adobe Lightroom offers a powerful image export feature that allows you to create copies of your edited photos in various formats, sizes, and with specific settings. This feature is essential for sharing your images online, printing, or archiving.
Converting HEIC files to the more widely supported JPG format within Lightroom can simplify your editing and sharing process. Here are the steps to do so:
1. Import your HEIC files into Lightroom by selecting the desired folder or importing them from your device.
2. Select all the HEIC files you want to convert to JPG by holding down the Command (Mac) or Control (Windows) key and clicking on the files. Alternatively, you can use the SHIFT key to select a continuous range of files.
3. Right-click on one of the selected files and choose "Export" from the drop-down menu.
4. In the Export window, choose a destination folder where you want the converted files to be saved.
5. In the File Settings section, choose "JPEG" as the file format.
6. Adjust the other export settings as desired, such as image size, quality, and metadata options.
7. Click on the "Export" button to start the conversion process.
Pros:
1. Convenient and integrated solution within Lightroom.
2. Retains the original file quality and metadata.
3. Allows for customization of export settings.
Cons:
1. Requires Adobe Lightroom software.
2. May take longer to export and convert large batches of HEIC files.
3. Limited to the features and capabilities of Lightroom’s export settings.
Alternative 1. How to Batch Convert HEIC to JPG Using Freetoolonline.com
If you prefer not to use Lightroom or do not have access to the software, an online tool like Freetoolonline.com can be a convenient option for converting HEIC to JPG. Here’s how to use it:
1. Go to Freetoolonline.com or similar online HEIC to JPG conversion tool.
2. Click on the "Select File" or similar button to choose the HEIC files you want to convert.
3. Once the files are uploaded, select "JPG" as the output format.
4. Adjust any additional settings, such as image quality or size, if provided.
5. Click on the "Convert" or similar button to start the conversion process.
6. Once the conversion is complete, click on the "Download" or similar button to save the converted JPG files to your device.
Pros:
1. No need for Adobe Lightroom or any other software installation.
2. Quick and easy process, especially for a small number of files.
3. Can be accessed from any device with an internet connection.
Cons:
1. Requires uploading and downloading files, which may not be suitable for large or sensitive files.
2. Limited control over export settings compared to dedicated software.
3. Relies on the availability and reliability of the online tool.
Alternative 2. How to Batch Convert HEIC to JPG Using TunesBro Software
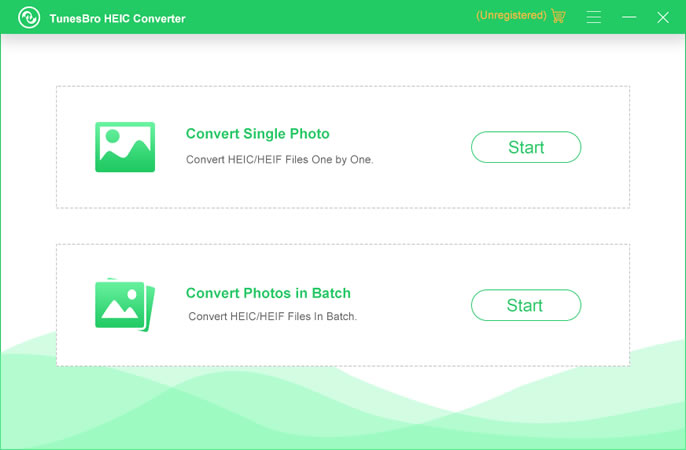
TunesBro HEIC Converter is a dedicated software solution designed specifically for converting HEIC files to various formats, including JPG. Here’s how to use it:


1. Download and install TunesBro HEIC Converter from the official website or a trusted source.
2. Launch the software and click on the "Add HEIC" or similar button to select the HEIC files you want to convert.
3. Choose the output format as "JPG" and specify a destination folder for the converted files.
4. Optionally, adjust any additional settings, such as image quality or size.
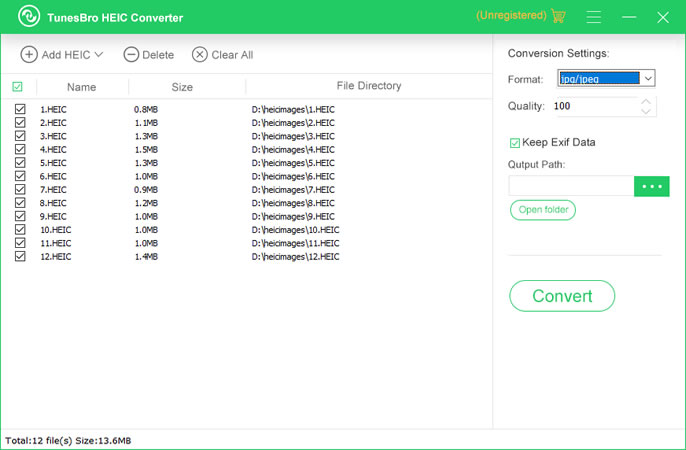
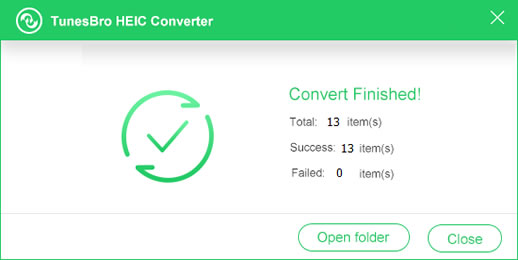
5. Click on the "Convert" or similar button to start the conversion process.
6. Once the conversion is complete, navigate to the destination folder to access the converted JPG files.
Pros:
1. Provides a dedicated solution for HEIC to JPG conversion.
2. Offers more control and flexibility in the conversion process.
3. Can handle large batches of files efficiently.
Cons:
1. Requires installation of third-party software on your device.
2. May not be available for all operating systems.
3. Some features may be limited in the freeware version.
Alternative 3. How to Batch Convert HEIC to JPG with Luma App
Android users can take advantage of the Luma app, which offers HEIC to JPG conversion directly on their devices. Here’s how to use it:
1. Install the Luma app from the Google Play Store or a trusted source.
2. Open the Luma app and grant the necessary permissions to access your photos.
3. Navigate to the folder or album containing the HEIC files you want to convert.
4. Long-press on one of the HEIC files to enable the selection mode.
5. Select all the HEIC files you want to convert by tapping on them.
6. Tap on the "Share" or similar button and choose "Convert to JPEG" from the share menu.
7. Wait for the app to process the conversion, which will create JPG copies of the selected files.
8. Once the conversion is complete, you can find the converted JPG files in the same folder or album.
Pros:
1. Offers a convenient and portable solution for HEIC conversion on Android devices.
2. No need for a computer or internet connection.
3. Automatic conversion and preservation of original files.
Cons:
1. Restricted to Android devices only.
2. Limited control over export settings compared to dedicated software.
3. Relies on the availability and performance of the Luma app.
What to Do If You Can’t Batch Converting HEIC to JPG in Lightroom
If you encounter any difficulties or restrictions with converting HEIC to JPG using the methods mentioned above, here are three alternative solutions:
1. Install a HEIC viewer or converter app on your device: There are several apps available on various platforms that specialize in handling HEIC files. These apps allow you to view, convert, or share HEIC files without the need for extensive conversion processes.
2. Convert HEIC files individually: If you only have a few HEIC files that need conversion, you can use any image editing software or online tool that supports HEIC files. Simply open each file and save it as a JPG individually.
3. Use an operating system-level conversion tool: Some operating systems, such as Windows, provide built-in conversion capabilities for HEIC files. You can right-click on a HEIC file, select "Convert to JPEG," and the operating system will create a JPG copy of the file.
Bonus Tips
1. Archive your original HEIC files: Even after converting HEIC files to JPG, it is advisable to keep a backup of the original files in case you need them in the future or if you want to explore different conversion options.
2. Use metadata preservation options: When converting HEIC files to JPG, make sure to choose an option that preserves important metadata such as location, date, and camera settings. This will ensure that your photos retain crucial information even after the format conversion.
3. Check for compatibility before sharing: Always confirm that the intended recipients of your converted JPG files can view and edit them without any issues. Test the compatibility across different devices and software to avoid any surprises.
FAQs about Batch Converting HEIC to JPG in Lightroom
Q1: Is it necessary to convert HEIC to JPG in Lightroom?
A: It depends on your specific needs and requirements. If you frequently work with non-compatible devices or software, converting HEIC to JPG within Lightroom can simplify your workflow.
Q2: Can the quality of HEIC files be preserved when converting to JPG?
A: Yes, as long as you choose the appropriate export settings, you can preserve the quality of HEIC files when converting them to JPG. However, it’s essential to note that certain aspects of the image may be affected during the compression process.
Q3: Are there any limitations to batch converting HEIC to JPG in Lightroom?
A: While Lightroom offers a convenient solution for batch converting HEIC to JPG, the process may take longer for larger file batches. Additionally, the export settings may have limitations compared to dedicated conversion software.
Q4: Can I convert HEIC to other image formats?
A: Yes, many conversion tools and software support various image formats, including PNG, BMP, and GIF. Keep in mind that different formats have different pros and cons, so choose the one that suits your needs.
Q5: Is it possible to convert HEIC files directly on my iPhone or iPad?
A: Yes, Apple devices running iOS 11 or later natively support converting HEIC files to JPG in the Photos app. Simply select the HEIC file, tap on the share button, and choose "Save as JPEG."
In Conclusion
Batch converting HEIC to JPG in Lightroom or using alternative methods can alleviate compatibility issues and simplify your photo editing and sharing processes. Consider the pros and cons described in this blog post to decide which method works best for your specific needs. Remember to preserve the original HEIC files and test the compatibility of the converted JPG files before sharing them. With the right approach, you can seamlessly work with HEIC files in Lightroom and other software without any limitations.