Table of Contents
Voice Memos is one of the most useful apps on an iPhone for recording audio notes, meetings, interviews, and even music. It allows you to make unlimited recordings and save them on iCloud or on your device. However, sometimes you may want to delete all those recordings permanently so that they don’t take up unnecessary space on your device or to keep your confidential information safe. This blog post aims to guide you through the process of permanently deleting voice memos on iPhone 14.
Video Tutorial:
What’s Needed
First, ensure that your iPhone 14 is fully charged, or connect it to a power source. Also, make sure that your phone has enough storage to accommodate voice memos. You may need to delete some unwanted apps, photos, and videos to free up space.
What requires your attention is…?
When deleting voice memos, make sure you don’t accidentally delete important voice memos that contain crucial information. Take your time to go through each recording to determine which ones you want to delete permanently and those you’d like to keep. Also, be sure to check your iCloud account and delete any stored voice memos.
Method 1: Delete Voice Memos from the Voice Memos app
1. Open the Voice Memos app on your iPhone.
2. Select the voice memo you want to delete.
3. Tap on the three dots icon at the bottom right corner of the screen.
4. Tap on “Delete Recording” from the options that appear.
5. A dialog box will pop up confirming that you want to delete the recording, tap “Delete” to complete the process.
Pros:
– Quick and easy to use
– Does not require any additional software or tools.
Cons:
– Tedious when deleting multiple voice memos.
Method 2: Delete Multiple Voice Memos at once from the Voice Memos app
1. Open the Voice Memos app on your iPhone.
2. Tap on "Edit" at the top right corner of the screen.
3. Select the multiple voice memos you want to delete by tapping on each recording.
4. Tap on "Delete" from the options that appear.
5. A dialog box will pop up confirming that you want to delete the recordings, tap “Delete” to complete the process.
Pros:
– Allows you to delete several voice memos at once
– You don’t need any additional software or tools.
Cons:
– Can be easy to select the wrong recordings if you’re in a hurry.
Method 3: Permanently delete voice memos using iPhone data eraser software
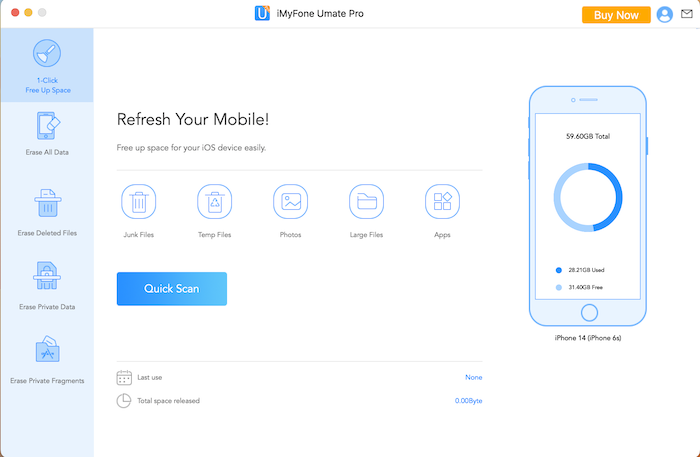
If you want to delete your voice memos permanently, then you can use an iPhone data eraser software like iMyFone Umate Pro. Here are the steps:
1. Download and install iMyFone Umate Pro on your computer.
2. Connect your iPhone to your computer via USB cable.
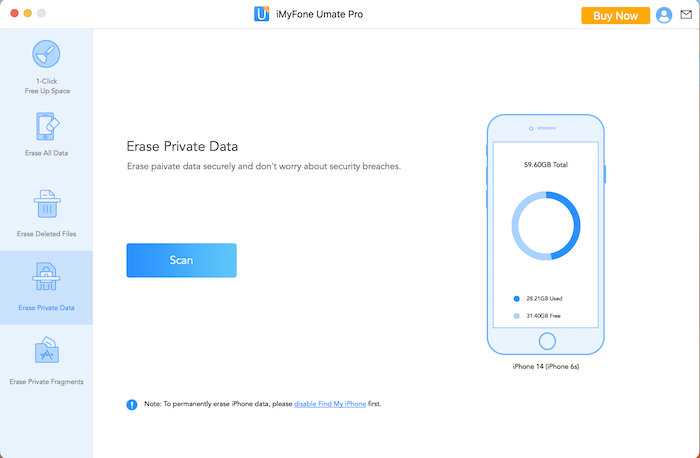
3. Open iMyFone Umate Pro and select the “Erase Private Data” mode.

4. Click on “Scan.”

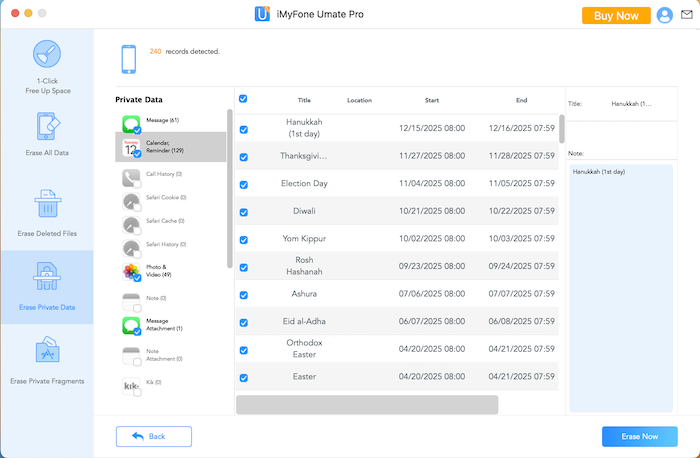
5. After scanning, select “Voice Memos” from the list of files that appear.
6. Click on “Erase Now” and confirm the deletion to permanently delete Voice Memos from your iPhone 14.

Pros:
– Permanently deletes voice memos with no chance of recovery
– Allows you to delete all voice memos at once.
Cons:
– Requires downloading and installing third-party software.
Method 4: Permanently delete voice memos using iCloud web
If you have synced your voice memos to iCloud, you can log in to the iCloud website on your computer’s browser and follow these steps:
1. Go to iCloud.com and log in with your Apple ID and password.
2. Click on "Voice Memos" to open the Voice Memos interface.
3. Select the voice memo you want to delete and click on the trash icon.
4. A dialog box will appear, click "Delete" to confirm the deletion.
5. Repeat the process for all the voice memo you want to remove.
Pros:
– Allows you to delete voice memos stored on iCloud cloud servers.
– Can be done without using an iPhone.
Cons:
– This method is more suited to deleting voice memos that are backed up on iCloud.
Why Can’t I Delete Voice Memos?
1. Outdated iOS version. Check if your iOS version is outdated and download the latest version.
2. Permission settings. Ensure that you have permission to delete voice memos on your iPhone. To check permission settings, go to Settings > General > Restrictions.
3. iCloud sync. If you have synced your voice memos to iCloud, you must go to iCloud to delete them.
Implications and Recommendations
Deleting voice memos permanently can free up storage space on your iPhone and help protect your privacy by keeping confidential recordings secure. We recommend backing up essential recordings in services like Dropbox, Google Drive, or iCloud before deleting them. Always double-check the voice memos you wish to delete to avoid accidental deletion.
FAQs
Q: Can I recover deleted voice memos?
A: It depends on how you deleted the voice memos. If you used a regular "delete" function, you can recover them from the "Recently Deleted" folder in the Voice Memos app on your iPhone. However, if you used third-party software like iMyFone Umate Pro, it is impossible to recover them.
Q: Do I have to delete voice memos one by one?
A: No, you can delete multiple voice memos at once by selecting them and then tapping on "delete."
Q: Why can’t I delete some voice memos on my iPhone?
A: You may be unable to delete voice memos on your iPhone due to outdated iOS versions, permission settings, or synced files on iCloud.
Q: Is it necessary to use iPhone data eraser software?
A: No, it isn’t necessary, but it can be the best option if you want to delete voice memos permanently and securely.
Q: Can I remove voice memos by restoring my iPhone to factory settings?
A: Yes, you can, but this will erase everything on your iPhone, including all your apps, files, and data, and leave it like a new iPhone.
Conclusion
Permanently deleting voice memos on iPhone 14 can help free up storage space and keep your private information secure. Depending on your preferences, you can use one of the four methods discussed above to delete voice memos. Remember to be careful when deleting voice memos and always double-check before clicking on the delete button.

