Table of Contents
Nowadays, we often encounter new file formats that can be a challenge to work with. One such format is HEIC, which stands for High-Efficiency Image Format. HEIC files are becoming increasingly popular due to their ability to store high-quality images in smaller file sizes. However, many applications and programs struggle to open and handle HEIC files, including popular image editing software like GIMP.
If you’re facing the challenge of converting HEIC to JPG in GIMP, don’t worry. In this blog post, we will explore various methods and alternatives that will help you batch convert HEIC files to JPG in GIMP. Whether you’re an amateur photographer or a professional graphics designer, these techniques will save you time, effort, and ensure seamless editing of your images.
Video Tutorial:
Introduction to GIMP Photo Editing Software
GIMP, which stands for GNU Image Manipulation Program, is a powerful and free open-source raster graphics editor used for tasks such as photo retouching, image editing, image composition, and more. It’s often considered a free alternative to commercial image editing software like Adobe Photoshop. GIMP provides a wide range of tools and features for various image manipulation tasks.
The Challenge of Batch Converting HEIC to JPG in GIMP
Converting HEIC to JPG in GIMP can be a daunting task, but with the right techniques, you can achieve it efficiently. Here are some challenges you may encounter:
- GIMP does not natively support the HEIC format, making it impossible to directly open and edit HEIC files.
- Manually converting each HEIC file to JPG can be time-consuming, especially if you have a large number of files.
- Using external tools or software for the conversion process may result in reduced image quality or additional costs.
- Compatibility issues may arise when opening the converted JPG files in other software or devices.
Now that we understand the challenges, it’s time to explore the methods and alternatives to batch convert HEIC to JPG in GIMP.
How to Batch Convert HEIC to JPG in GIMP
Before diving into the steps, let’s briefly discuss the method. In this method, we will use an external tool to convert HEIC files to JPG format, and then import them into GIMP for further editing.
Now, let’s proceed with the steps:
Step 1: Install HEIC Converter Software
To begin, you will need to install HEIC converter software on your computer. There are several options available online, such as Zamzar Online Converter, TunesBro HEIC Converter, and Microsoft HEIC Extension. Choose the one that suits your requirements and follow the installation instructions provided by the software.
Step 2: Convert HEIC to JPG
Once the HEIC converter software is installed, you can begin the conversion process. Open the software and locate the HEIC files that you want to convert. Select the destination folder for the converted JPG files, and choose the JPG format as the output. Start the conversion process, and wait for it to complete.
Step 3: Import JPG Files into GIMP
After the conversion is finished, open GIMP on your computer. Go to File > Open and navigate to the folder where the converted JPG files are saved. Select the files you want to import and click on the Open button. The converted JPG files will now be imported into GIMP, ready for further editing.
Pros:
- Allows you to convert HEIC files to JPG without losing image quality.
- Enables batch conversion, saving you time and effort.
- Utilizes GIMP for further editing, ensuring seamless workflow.
Cons:
- Requires an additional external tool/software for HEIC to JPG conversion.
- May result in slightly larger file sizes compared to the original HEIC files.
- Limited to GIMP for editing, may not be suitable if you prefer other image editing software.
Alternative 1. How to Batch Convert HEIC to JPG Using Zamzar
If you prefer using an online converter instead of installing software, Zamzar Online Converter is a reliable option. Let’s explore the steps:
Step 1: Visit the Zamzar website
First, go to the Zamzar website by typing "Zamzar Online Converter" in your preferred search engine. Click on the appropriate search result to visit the website.
Step 2: Upload HEIC Files
On the Zamzar website, click on the "Add Files" button or drag and drop your HEIC files into the designated area. You can also import files from cloud storage platforms such as Dropbox or Google Drive.
Step 3: Choose Output Format
Select "JPG" as the output format from the drop-down menu. You can also customize other conversion settings if needed.
Step 4: Enter Email and Convert
Enter your email address to receive the converted files. Then click on the "Convert Now" button to initiate the conversion process. The conversion may take a few minutes, depending on the number and size of the files.
Step 5: Download the Converted JPG Files
Once the conversion is completed, you will receive an email containing a download link for the converted JPG files. Click on the link to download the files to your computer.
Pros:
- Does not require installation, as it is an online converter.
- Supports batch conversion of HEIC files to JPG format.
- Accessible from any device with an internet connection.
Cons:
- Requires an internet connection for the conversion process.
- May have limitations on the maximum file size for conversion.
- Privacy concerns when uploading files to an online converter.
Alternative 2. How to Batch Convert HEIC to JPG Using TunesBro HEIC Converter
If you prefer using dedicated software for HEIC to JPG conversion, TunesBro HEIC Converter is a popular choice. Let’s explore the steps:
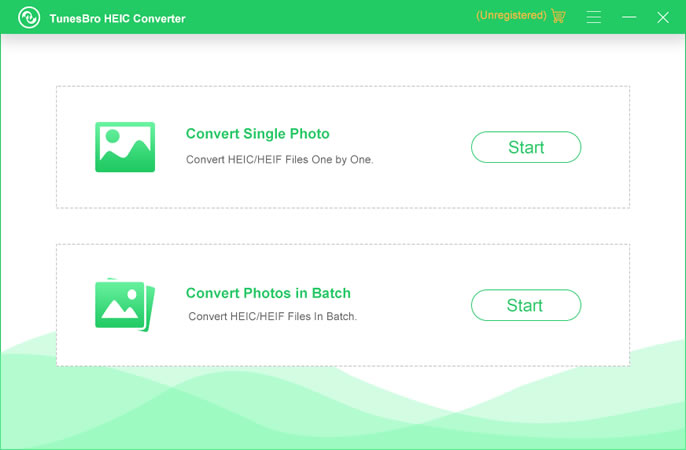
Step 1: Download and Install TunesBro HEIC Converter
Visit the official TunesBro website and download the HEIC Converter software. Follow the provided instructions to install it on your computer.


Step 2: Add HEIC Files
Launch TunesBro HEIC Converter and click on the "Add Files" button to import your HEIC files. You can select individual files or entire folders for batch conversion.
Step 3: Choose Output Format
Select "JPG" as the output format from the available options. You can also customize other conversion settings, such as image quality and resolution.
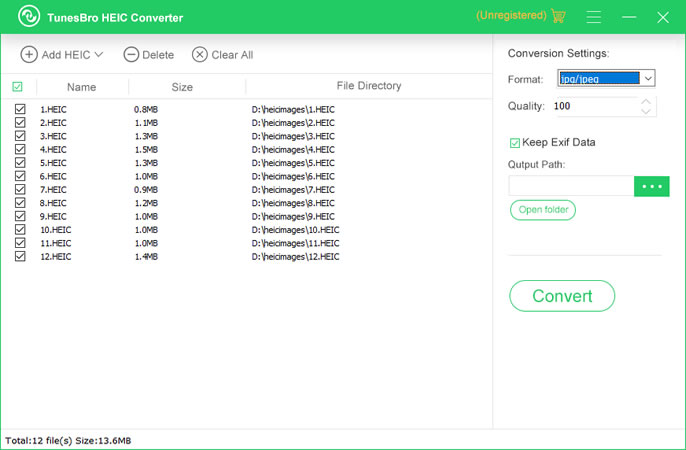
Step 4: Convert HEIC to JPG
Once you have selected the desired settings, click on the "Convert" button to start the conversion process. The software will convert all the selected HEIC files to JPG format.
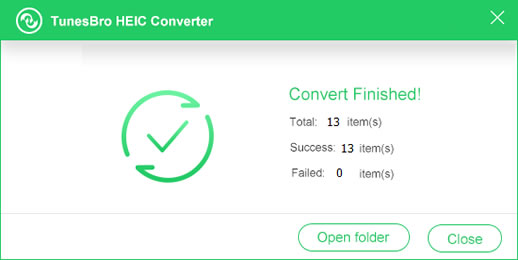
Step 5: Locate the Converted Files
After the conversion is completed, you can find the converted JPG files in the output folder specified during the conversion process. The files are now ready to be imported into GIMP for further editing.
Pros:
- Provides a dedicated software solution for HEIC to JPG conversion.
- Enables batch conversion with options for customizing the output format.
- Ensures high-quality conversion without any loss of image data.
Cons:
- Requires installation of additional software on your computer.
- May have limited functionalities compared to professional photo editing software.
- Not suitable for users who prefer online or free conversion methods.
Alternative 3. How to Batch Convert HEIC to JPG Using Microsoft HEIC Extension
If you’re using a Windows 10 computer, Microsoft provides a HEIC extension that allows you to view and convert HEIC files to JPG format. Let’s explore the steps:
Step 1: Download and Install Microsoft HEIC Extension
Go to the Microsoft Store on your Windows 10 computer and search for "HEIC Extension." Download and install the extension to add HEIC support to your operating system.
Step 2: Locate the HEIC Files
Navigate to the folder containing the HEIC files that you want to convert. Select all the files you want to convert to JPG format.
Step 3: Right-Click and Convert
Right-click on one of the selected HEIC files and choose "Convert to JPEG" from the context menu. Windows will convert all the selected HEIC files to JPG format.
Step 4: Import JPG Files into GIMP
Open GIMP on your Windows computer and go to File > Open. Navigate to the folder where the converted JPG files are saved. Select the files you want to import and click on the Open button. The converted JPG files will now be imported into GIMP for further editing.
Pros:
- Does not require installation of additional software.
- Integrated within the Windows operating system.
- Supports batch conversion of HEIC files to JPG format.
Cons:
- Only available for Windows 10 users.
- May lack advanced customization options compared to dedicated converter software.
- Not suitable for users who prefer online or third-party converter tools.
What to Do If You Can’t Batch Converting HEIC to JPG in GIMP
If you encounter difficulties or the above methods don’t work for you, here are alternative solutions:
1. Use a Different Image Editing Software:
If GIMP does not support HEIC files, consider using other image editing software that does support the format. Adobe Photoshop, Lightroom, and Corel PaintShop Pro are popular options with HEIC compatibility.
2. Convert HEIC to JPG via an Online Converter:
If you are unable to install software or prefer not to, you can use online converter tools specifically designed for HEIC to JPG conversion. Websites like CloudConvert and FreeConvert offer online HEIC to JPG conversion services.
3. Utilize Mobile Apps or Devices:
If you have access to a mobile device like an iPhone or iPad, you can open the HEIC files on the device and use built-in options to export the images as JPG or other compatible formats.
Bonus Tips
Here are a few bonus tips to enhance your HEIC to JPG conversion experience:
- Always keep a backup of your original HEIC files before conversion to avoid any potential data loss or corruption.
- Regularly update your software and plugins to ensure compatibility with the latest file formats and standards.
- Consider organizing your HEIC files into separate folders or categories to streamline the batch conversion process.
FAQs about Converting HEIC to JPG in GIMP
Q1: Is it possible to convert HEIC to JPG without losing image quality?
A: Yes, it is possible to convert HEIC to JPG without losing image quality by using reliable conversion methods and software that preserve the original image data during the conversion process.
Q2: Can I convert HEIC files to other image formats apart from JPG?
A: Yes, most conversion software and online converters offer options to convert HEIC files to various image formats, such as PNG, BMP, TIFF, and GIF.
Q3: Are there any limitations on the file size or number of HEIC files I can batch convert?
A: Some software or online converters may have limitations on file size and the number of files you can convert at once. It is recommended to check the system requirements and limitations of the chosen method beforehand.
Q4: Will the converted JPG files be compatible with other image editing software?
A: Generally, JPG files are widely supported by various image editing software, including popular options like Adobe Photoshop and Corel PaintShop Pro. However, it is recommended to check the compatibility of the software you intend to use.
Q5: How can I convert HEIC files to JPG on a Mac computer?
A: For Mac users, the built-in Preview application can be used to open and convert HEIC files to other image formats, including JPG. Simply open the HEIC file in Preview and choose "Export" to select the desired format.
In Conclusion
It seems a challenging task at first when you are trying to batch convert HEIC to JPG in GIMP, but with the right methods and alternatives, it becomes a seamless process. Whether you choose to use external tools like Zamzar Online Converter or dedicated software like TunesBro HEIC Converter, the key is to ensure the preservation of image quality and compatibility with your preferred image editing software.
Remember, it’s always a good practice to keep the original HEIC files as backups and explore multiple conversion options to find the one that suits your needs best. With the methods, alternatives, bonus tips, and answers to frequently asked questions provided in this blog post, you are now equipped with the knowledge to confidently convert HEIC to JPG in GIMP and enhance your image editing workflow.